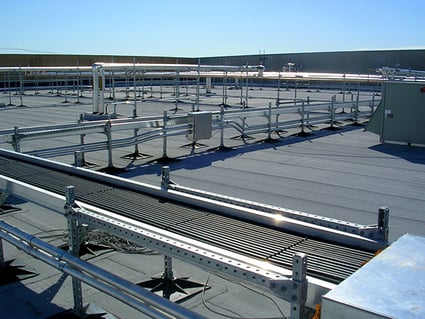
 A lot of thought must go into choosing and installing cable trays in order to ensure the safety and effectiveness of the cables that run through them. Those systems ensure the effectiveness of the cables they protect, reduce wear and tear to rooftop installations, and help ensure safety for people, as well as, property.
1) Use Cable Trays!
The first and most obvious of these best practices is that you should always use cable trays. Commercial rooftops typically have a number of different types of cables running across them, carrying high and low-voltage electrical current to meet power and communication needs.
It's important to protect both the cables themselves, as well as, the insulation around them. Don't let cables sag between trays, as that can cause wear and tear and eventual damage. It's also crucial to protect the insulation, which is best done by de-energizing cables during installation. That way, all parts of the rooftop installation are protected, not just the cables themselves.
2) Include Expansion Joints at the Appropriate Intervals
Cable tray expansion joints help ensure the effectiveness of cable trays despite the wide range of temperatures that exist on rooftops. Burning heat and icy cold cause expansions and contractions of trays, which can cause them to tear loose from their cable tray supports if you don’t use expansion joints.
An expansion joint is the place where two trays meet, and are connected along the connector plate, along which each tray can move inward or outward, depending on temperature. The two trays are attached to one another using a strip that can stretch or retract in response to temperature as well. For your specific application, be sure to consult this handy guide from the Cable Tray Institute.

3) Implement Proper Spacing For Cable Tray Supports
A number of factors implement the spacing for cable tray supports, including the material of the tray, the highest and lowest temperatures the rooftop will likely encounter, and the temperature at the time of installation. The cable tray support must be located no less than 2 feet from each side of the expansion joint splice plates position, allow the cable tray to expand without distortion, be anchored at the support closest to the midpoint, and allow trays to expand and contract in respond to temperature shifts. Consult the guide listed above for more information.
4) Consider Your Application Before Purchasing Cable Trays
Cable trays aren’t made to support just any type of line. Water and compressed air tubing, for instance, cannot be supported by cable trays. According to the Cable Tray Institute, “NEC section 300.8 does not permit any tube, pipe, or equal for water, air gas, drainage, steam, or any service other than electrical in raceways or cable trays containing electrical conductors.” Rather, they are meant only to support power, signal, communication and optical fiber cables only.
Also, there are NEC rules dictating how each of these cable types must be segregated, either by dividers within the tray or by separate trays. This helps reduce noise and interference from other cables.
Installing cable trays according to best practices isn’t difficult, but it does take expert knowhow. If you’re looking for innovative, high-performance rooftop pipe and equipment support systems, or information about them, you’ve come to the right place. Here at PHP Systems/Design, that’s exactly what we do. Get in touch today to learn more.


